I was able to recover an old post (which was hacked many years ago). Now I have uploaded it here on the blog:
I decided to start making a short guide based on my experience to be used to all beginner fly tiers. There is a lot of info on web, also in books, and I’m sure that is nothing new in these articles. But probably these photos and my explanations based on my experience will help others to learn faster than I did :).
So this time I start with tails for dry flies:
Tails have the role to provide the right balance of the fly and also the insect print or also called silhouette of the fly. If the fly is a spinner, or a dun the tail will have different positions. Usually this is not so important but are moments when fish are so shy and suspicious and if the fly is not perfect made will refuse it.
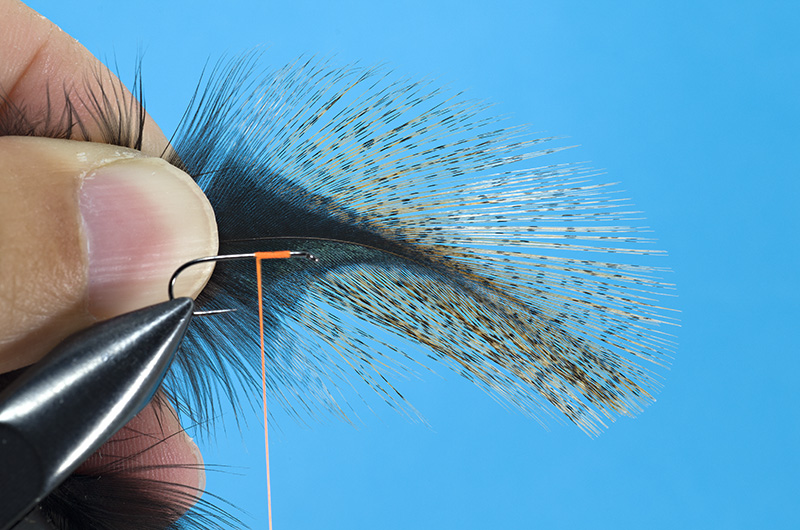
For classic dry flies the tail is made from different materials that float or have a neutral density. Hair from deer, hair fibers from nutria or castor are used but the most used materials are the barbs from rooster feathers. Unfortunately those from hen are not good for dry flies because the barbs soak water due the characteristic structure. You can see bellow how the hen barbs are stick together.
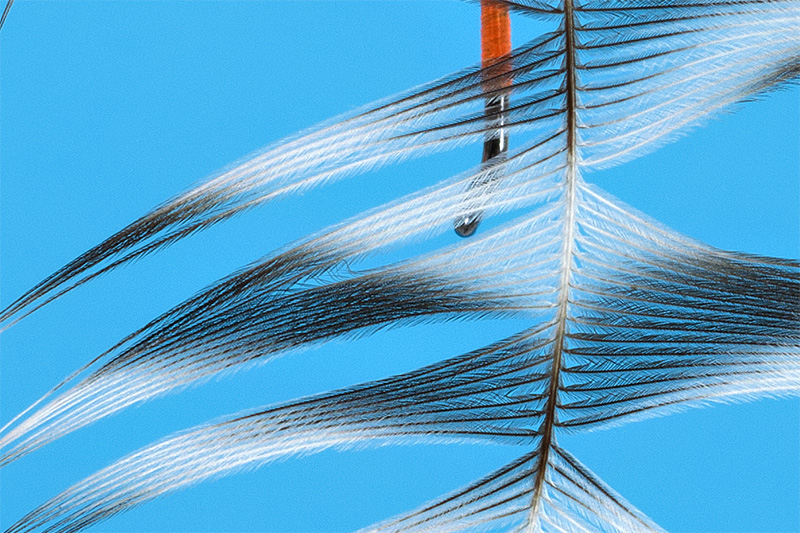
They behave like this because the barbs are soft and have a kind of small hooks that will make the them to remain “glued”. Conclusion: barbs absorb water and will not help the fly to float.
Other feathers with the same structure are: european common partridge, french partridge, jey, some feathers from ducks. So if you will see dry flies tied with partridge barbs as tails , probably will look nice but will not float .
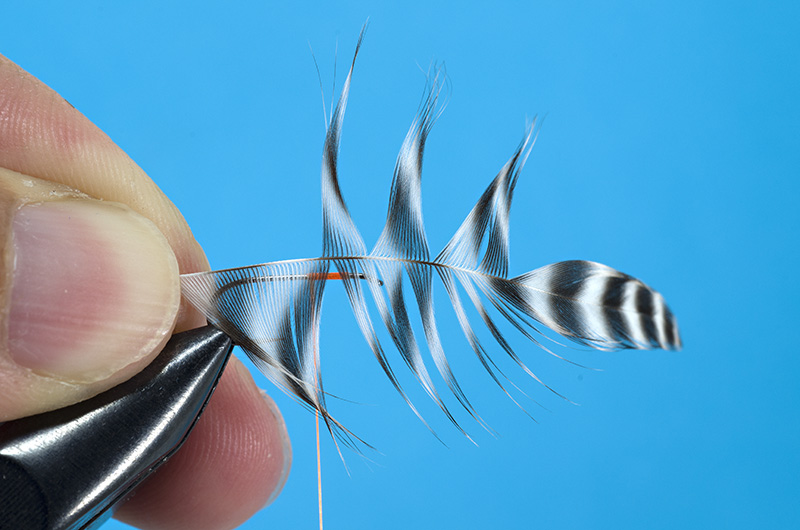
For example bellow is a feather of classic domestic rooster from the cape:
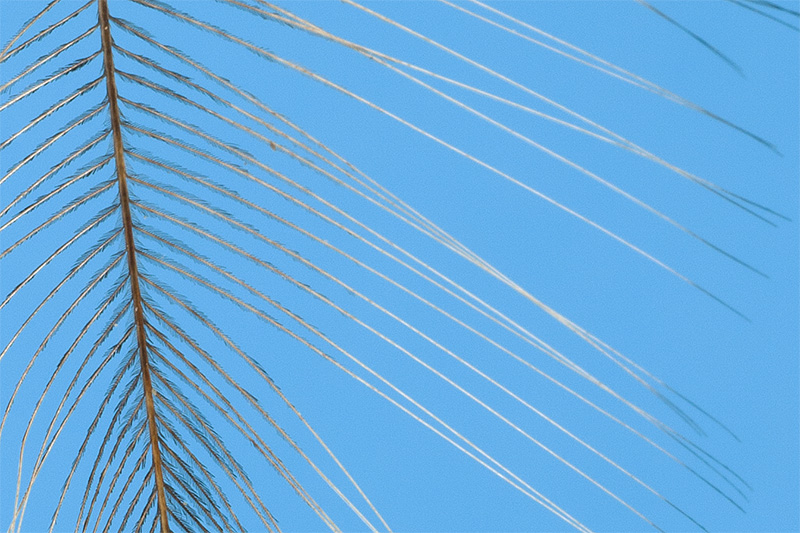
Those called small hooks from the barbs are very closed to the stem of the feather. Then the barb is nice and shiny without anything else attached. The zone where the barbs have those small “hooks” is called also soft area or soft core area. All the time you should use barbs nice and shiny and as much as possible without soft core part.
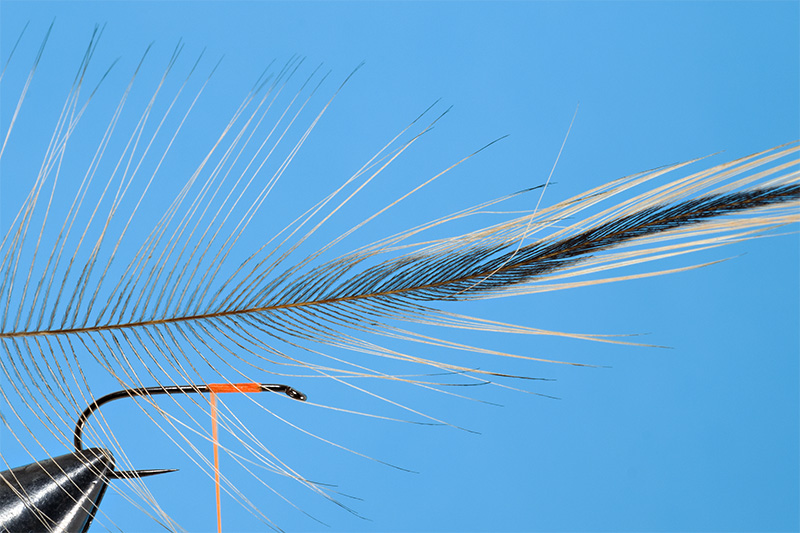
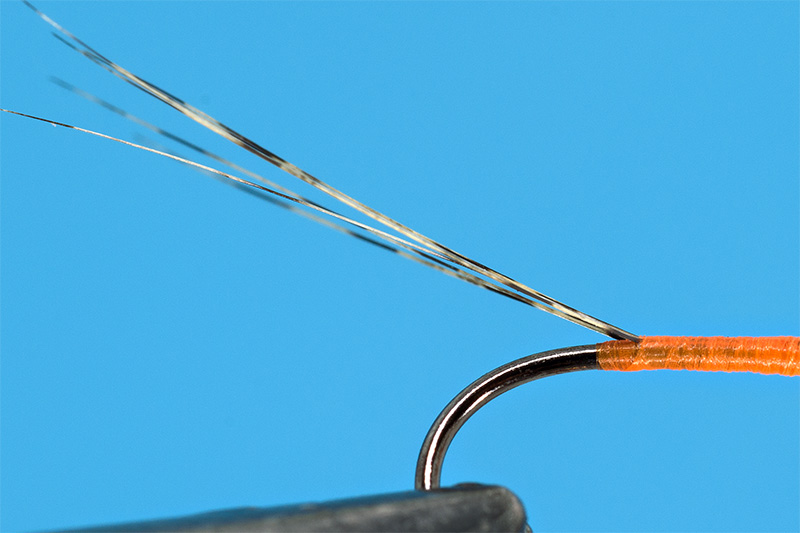
I prefer to use barbs from Spanish Coq de Leon Pardo or Coq de Leon Indio because these barbs are special, beautiful colored, translucent and are shiny with an interesting glow exactly like tails of natural insects.
More than that are more resistant , elastic and without matte color zones like in the situation of the classic rooster (Indian rooster or other European classic rooster raised for meat). For example if you take a feather from an indian cape you will notice that one part is shinny and one part is matte. You should mix the barbs to have an homogenous tail. Instead if you use barbs from Spanish rooster the color of the feather will remain the same for both sides of the feather.
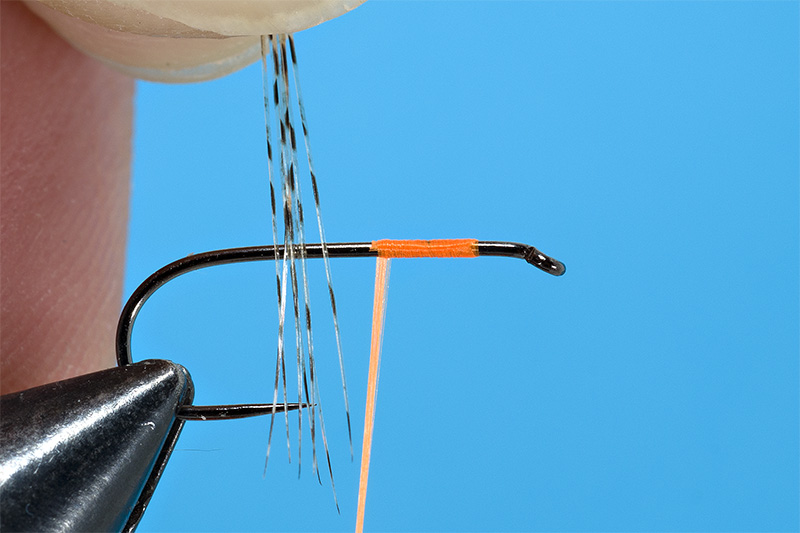
Before fixing the barbs is good to know that too many barbs will make the fish to refuse the fly. Also if are not enough the fly will not float for a long period of time. For this reason is better to use longer barbs instead to have a shorter tail but thicker. Bellow I use 6 barbs for a size #12 and I like to have the tail 2 times longer than the hook shank. If are too long also the fish will detect that the insect is artificial and will spit it. Especially the grayling will do that. For example our old local fisherman prefer to tie the flies for grayling without tail and with hackle tied collar.
Anyway is tho way to measure the tail fast and easy : using the hook shank as reference or the gap of the hook. To have uniform tails for your flies I recommend to tie the fly on the same hook size and when you are satisfied you should go to the next size.

In our fly tying world the length of the tail for a dry fly (ephemera type of imitation) should be between one and half the hook shank length up to 3 times length. Or 2 times gape size up to 4 time gape size. The length size is correlated with the number of the barbs. For a size #12 you can have 6-8 barbs, for a size #14 you can have 4 to 7 barbs, for size #16 3-4 barbs and for size 18 and down you can remain at 3 barbs.
Take in consideration also that if you make a heavy dressed dry fly in hackle than also the tail should be dens. Otherwise the fly will not be well balanced and will not float in the proper manner .
When you fix/add materials in tying process is good to know that we must have relaxed hands . For this is better to have all the time the left hand ( in this case ) all the time supported by vice like in the photo bellow. In this way you can tie flies without having tired hand. A tired hand will increase the tying time ( shaking, imprecision in adding tail fibers – for example, etc. ) and the fly will not be so nice and homogeneous.
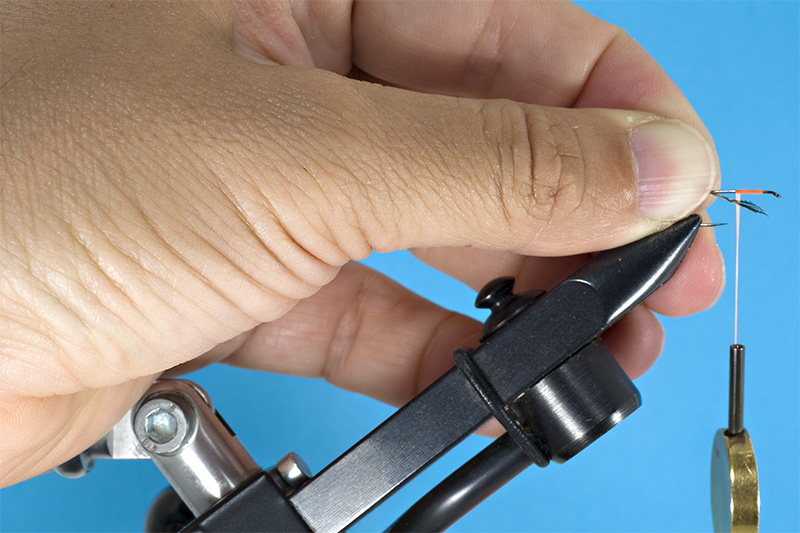
So for this reason is very important to buy/use a vice that is ergonomic for tying process and not only beautiful. Should be a tool that will help you to tie faster and better.
The right position for adding materials , in this situation fibers for making tails is bellow and is generated by the anatomical angles For this reason the most relaxed way to pinch and fix the barbs is well described by the photo bellow:
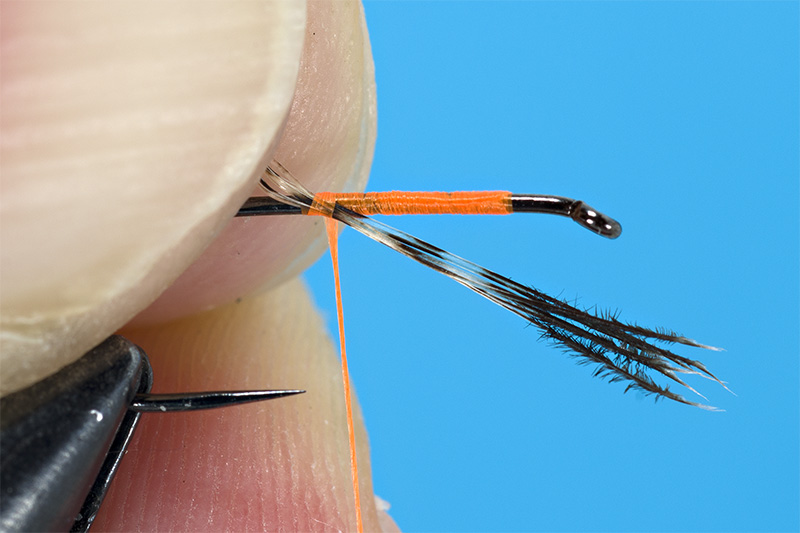
A 30-45 degree angle from the left to right. All the time when you fix the barbs put them between hook shank and you and cross with tying thread. In this way the fibers will not slip and will be well fixed .
After a few turns pull the base of the fibers and lay them on the hook shank . Just go with the thread turns and secure the tails. To have them well fixes is better to maintain a continuous tension in thread and with the left arm pull in the upper position the tips of the barbs. Continue with wrapping:
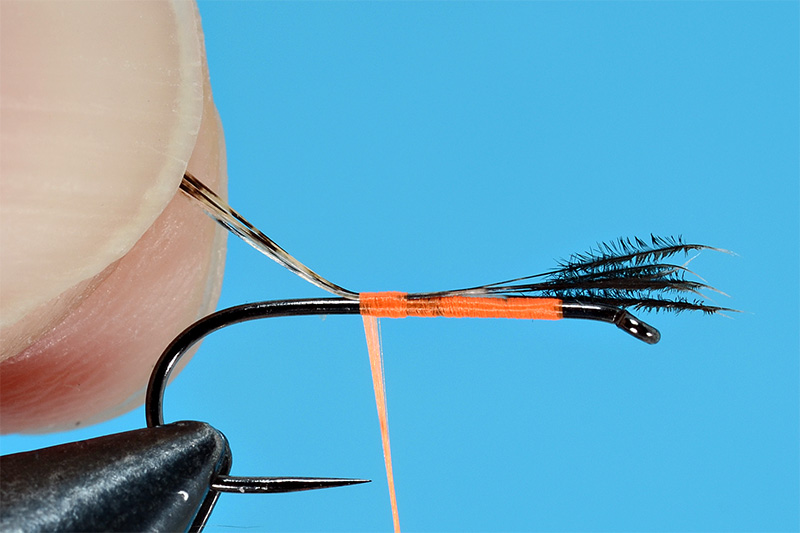
Now you will have a nice well fixed tail. It will be symmetrical and collinear with the axis of the hook
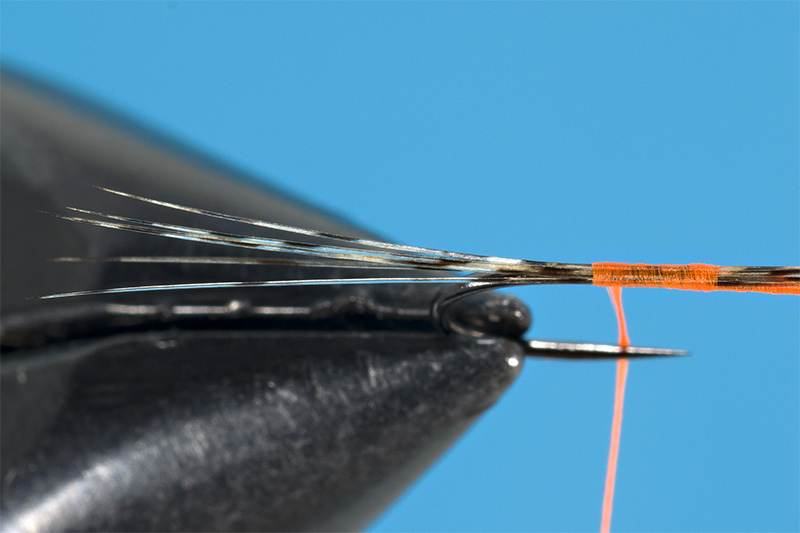
If you don’t keep the tips of the barbs with the left arm the thread will twist and fix the barbs orientated on the hook shank in the thread turn direction:
Probably not all pay attention at this details but a wrong fixed tail means an improper floating of the fly on the water.
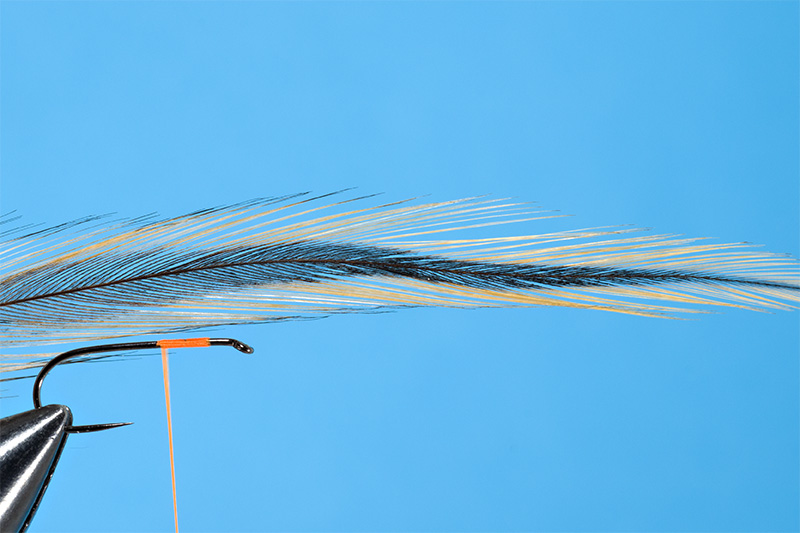
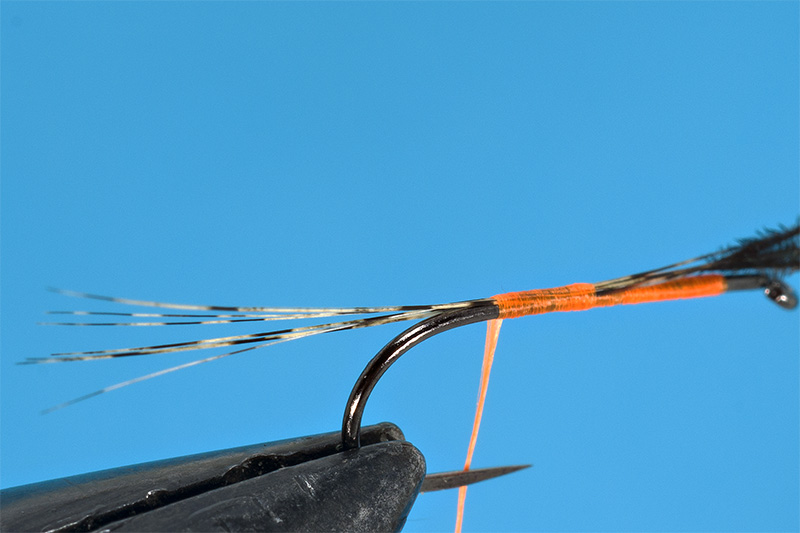
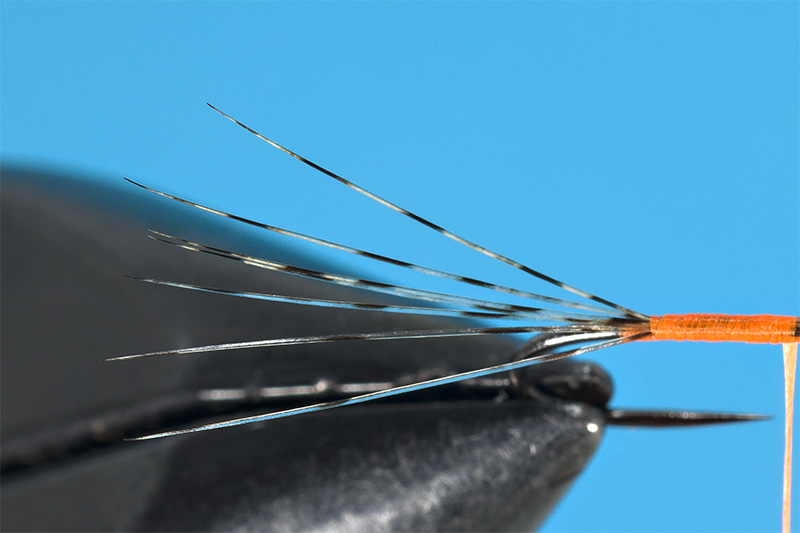
Spread tail is easy to be done, just make 2 or 3 turns under the fixed barbs and you will make the barbs to stay upper and spread:
Leave a Reply